Sign In
Upload
Manuals
Brands
Toshiba Manuals
Flat Panel TV
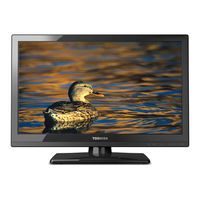
19SL410U
Toshiba 19SL410U Manuals
Manuals and User Guides for Toshiba 19SL410U. We have
4
Toshiba 19SL410U manuals available for free PDF download: Owner's Manual, Specifications, Energy Manual
Toshiba 19SL410U Owner's Manual (62 pages)
Integrated High Definition LCD Television
Brand:
Toshiba
| Category:
LCD TV
| Size: 37.35 MB
Table of Contents
Safety Precautions
2
Important Safety Instructions
3
Installation, Care, and Service
3
Choosing a Location for Your Lcd Tv
5
Important Notes about Your Lcd Tv
7
Trademark Information
7
Table of Contents
8
Chapter 1: Introduction
9
Features of Your New TV
9
Overview of Steps for Installing, Setting Up, and Using Your New TV
10
TV Front and Side Panel Controls and Connections
11
TV Back Panel Connections
12
Chapter 2: Connecting Your TV
13
Overview of Cable Types
13
About the Connection Illustrations
13
Connecting a VCR and Antenna, Cable TV or Camcorder
14
Connecting a DVD Player with Colorstream
15
(Component Video), a VCR, or a Satellite Receiver
15
Connecting an HDMI or DVI Device to the HDMI Input
16
REGZA-LINK® Connection
17
Connecting a Digital Audio System
18
Connecting a Stereo Audio System
18
Connecting a Personal Computer (PC)
19
Chapter 3: Using the Remote Control
20
Installing the Remote Control Batteries
20
Remote Control Effective Range
20
Adjusting the Viewing Angle
20
Learning about the Remote Control
21
Chapter 4: Menu Layout and Navigation
22
Main Menu Layout
22
Setup/Installation Menu Layout
23
Navigating the Menu System
23
Chapter 5: Setting up Your TV
24
Initial Setup
24
Selecting the Menu Language
24
Configuring the Antenna Input Source for the ANT/CABLE Terminal
24
Programming Channels into the Tv's Channel Memory
24
Programming Channels Automatically
25
Setting Channel Skip
26
Labeling Channels
26
Setting the HDMI® Audio Mode
27
Connecting an HDMI® or DVI Device to the HDMI Input
27
Viewing the Digital Signal Meter
28
Setting the Time Zone
28
Viewing the System Status
28
Reset Factory Defaults
28
Chapter 6: Using the Tv's Features
29
Selecting the Video Input Source to View
29
Labeling the Video Input Sources
29
To Clear the Input Labels
30
Tuning Channels
30
Tuning Channels Using the Channel Browser
30
Favorites Browser
30
To Open the Channel Browser
31
Elements of the Channel Browser
31
Adding and Clearing Channels and Inputs in the History List
32
Setting the Channel Tuning Mode
32
Tuning to the Next Programmed Channel
32
Tuning to a Specific Channel (Programmed or Unprogrammed)
32
Switching between Two Channels Using Channel Return
33
Switching between Two Channels Using Surflock
33
Selecting the Picture Size
33
Scrolling the Theaterwide® Picture (Theaterwide 2 and 3 Only)
35
Using the Auto Aspect Ratio Feature
35
Selecting the Cinema Mode
35
Using the FREEZE Feature
36
Adjusting the Picture
36
Selecting the Picture Mode
36
Adjusting the Picture Quality
36
Using the Closed Caption Mode
37
Base Closed Captions
37
Digital CC Settings
37
CC Selector
37
Adjusting the Audio
38
Muting the Sound
38
Using the Digital Audio Selector
38
Selecting Stereo/Sap Broadcasts
38
Adjusting the Audio Quality
39
Selecting the Optical Audio Output Format
39
Using the Dolby® Digital Dynamic Range Control Feature
39
Using the Locks Menu
39
Entering the PIN Code
39
If You Cannot Remember Your PIN Code
40
Changing Your PIN Code
40
Blocking TV Programs and Movies by Rating (V-Chip)
40
Downloading an Additional Rating System for Blocking TV Programs and Movies
41
Locking Channels
42
Unlocking Programs Temporarily
42
Using the Input Lock Feature
42
Using the Game Timer
43
Using the Control Panel Lock Feature
43
Using the PC Settings Feature
43
Setting the PC Audio
44
Using the Media Player
44
Using the Media Player with USB
44
To Select the Auto Start Function
45
To Open the Media Player
45
Viewing Photo Files
45
Playing Music Files
46
During Playback
46
Viewing Photo Files and Playing Music Files at same Time
46
Setting the Sleep Timer
47
Automatic Power down
47
No Signal Power down
48
Using REGZA-LINK
48
REGZA-LINK® Playback Device (DVD Player, Etc.) Control
48
REGZA-LINK® Input Source Selection
49
VOLUME and MUTE Controls of Audio Receiver
49
Other REGZA-LINK® Functions
49
Displaying TV Status Information
50
Understanding the Last Mode Memory Feature
50
Chapter 7: Using the Tv's Advanced Features
51
Using the Advanced Picture Settings Features
51
Using Dynamic Contrast
51
Using the Static Gamma Feature
51
Selecting the Color Temperature
51
Using Cableclear® Digital Noise Reduction
51
Using MPEG Noise Reduction
52
Using the Color Master® Feature
52
Using the Base Color Adjustment
52
Using the Game Mode Feature
52
Chapter 8: Troubleshooting
53
General Troubleshooting
53
Remote Control Problems
54
Hdmi Problems
54
Channel Tuning Problems
54
Media Player Problems
54
Closed Caption Problems
54
Chapter 9: Appendix
55
Specifications
55
Acceptable Signal Formats for PC in and HDMI Terminals
56
Limited United States Warranty for LCD Televisions
57
Limited Canadian Warranty for Toshiba Brand Flat Panel Televisions
58
Advertisement
Toshiba 19SL410U Owner's Manual (62 pages)
Integrated High Definition LCD Television
Brand:
Toshiba
| Category:
LCD TV
| Size: 9.45 MB
Table of Contents
Important Safety Instructions
3
Installation, Care, and Service
3
Table of Contents
8
Chapter 1: Introduction
9
Features of Your New TV
9
Overview O}" Steps for Installing, Setting Up, and Using Your New TV
10
Fv Front and Side Panel Controls and Connections
11
TV Back Panel Connections
12
Chapter 2: Connecting Your TV
13
Overview of Cable Types
13
About the Connection Illustrations
13
Connecting a VCR and Antenna, Cable TV or Camcorder
14
Connecting a Dvdplayer with Colorstream® (Component Video), a VCR, or a Satellite Receiver
15
Connecting an HDMI® or DVI Device to the HDMI Input
16
REGZA-LINK® Connection
17
Connecting a Digital Audio System
18
Connecting a Stereo Audio System
18
Connecting a Personal Computer (PC)
19
Chapter 3: Using the Remote Control
20
Installing the Remotecontrol Batteries
20
Remote Control Effective Range
20
Adiusting the Viewing Angle
20
Learning about the Remote Control
21
Chapter 4: Menu Layout and Navigation
22
Main Menu Layout
22
Setup/Installation Menu Layout
23
Navigating the Menu System
23
Chapter 5: Setting up Your TV
24
Initial Setup
24
Selecting the Menu Language
24
Configuring the Antenna Input Source for the Ant/Cableterminal
24
Programming Channels into the Tv's Channel Memory
24
Programming Channels Automatically
25
Setting Channel Skip
26
Labeling Channels
26
Setting the HDMI® Audio Mode
27
Viewing the Digital Signal Meter
28
Setting the Time Zone
28
Viewing the System Status
28
Reset Factory Defaults
28
Chapter 6: Using the Tv's Features
29
Selecting the Video Input Source to View
29
Labeling the Video Input Sonrces
29
To Clear the Input Labels
30
Tuning Channels
30
Tuning Channels Using the Channel Browser
30
Favorites Browser
30
To Open the Channel Browsert'_
31
Elements of the Channel Browser
31
Adding and Clearing Channels and Inputs in the History List
32
Setting the Channel Tuning Mode
32
Tuning to the Next Progralmned Channel
32
Tuning to a Specific Channel (Progralmned or Unprogralmned)
32
Switching between Two Channels Using Channel Return
33
Switching between Two Channels Using Surflock
33
Selecting the Picture Size
33
Scrolling the Theaterwide S: Picture (Theaterwide 2 and 3 Only)
35
Using the Auto Aspect Ratio Feature
35
Selecting the Cinema Mode
35
Using the Freezefeature
36
Adiusting the Picture
36
Selecting the Picture Mode
36
Adiusting the Picture Quality
36
Using the Closed Caption Mode
37
Base Closed Captions
37
Digital CC Settings
37
C( Selector
37
Adiusting the Audio
38
Muting the Sound
38
Using the Digital Audio Selector
38
Selecting Stereo/Sap Broadcasts
38
Adiusfing the Audio Quality
39
Selecting the Optical Audio Output L\)Rmat
39
Using the Dolby_, Digital Dynamic Range Control Feature
39
Using the Locks Menu
39
Entering the PIN Code
39
If You Cannot Remember Your PIN Code
40
Changing Your PIN Code
40
(V-Chip)
40
Downloading an Additional Rating System for Blocking TV Programs and Movies
41
Locking Channels
42
Unlocking Programs Temporarily
42
Using the Input Lock Feature
42
Using the Game Timer_R
43
Using the Control Panel Lock Feature
43
Using the PC Settings Feature
43
Setting the PC Audio
44
Using the Media Player
44
Using the Media Player with USB
44
To Select the Auto Start Fnnction
45
To Open the Media Player
45
Viewing Photo Files
45
Playing Music Files
46
Dttring Playback
46
Viewing Photo Files and Playing Music Files at same Time
46
Setting the Sleep Timer
47
Automatic Power down
47
No Signal Power down
48
Using REGZA-LINK S
48
Control
48
REGZA-LINK S: Playback Device (DVD Player, Etc Control
48
REGZA-Link:s: Input Sottrce Selection
49
VOLUME and MUTE Controls of Audio Receiver
49
Other REGZA-LINK_R Functions
49
Displaying TV Status Information
50
Understanding the Last Mode Memory Featnre
50
Chapter 7: Using the Tv's Advanced Features
51
Using the Advanced Picture Settings Features
51
Using Dynamic Contrast
51
Using the Static Gamma Featnre
51
Selecting the Color Temperature
51
Using Cableclear_R Digital Noise Reduction
51
Using MPEG Noise Reduction
52
Using the Color Masters: Feature
52
Using the Base Color Adiustment
52
Using the Game Mode Feature
52
Chapter 8: Troubleshooting
53
General Troubleshooting
53
Chapter 9: Appendix
55
Specifications
55
Acceptable Signal Formats for PC in and HDMI Terminals
56
Limited United States Warranty ±Br Led Televisions
57
Limited Canadian Warranty for Toshiba Brand Flat Panel Televisions
58
Toshiba 19SL410U Specifications (2 pages)
19" class LED HDTV
Brand:
Toshiba
| Category:
TV
| Size: 2 MB
Advertisement
Toshiba 19SL410U Energy Manual (1 page)
Energy Guide
Brand:
Toshiba
| Category:
Flat Panel TV
| Size: 0.61 MB
Advertisement
Related Products
Toshiba 14VL43U
Toshiba 19BL502B
Toshiba 19SL400U
Toshiba 19SLV411U
Toshiba 19SL738B
Toshiba 19SL410UM
Toshiba 19SL400
Toshiba 19SL738G
Toshiba 19SLDT3R
Toshiba 19SLDT3
Toshiba Categories
Laptop
Air Conditioner
TV
LCD TV
All in One Printer
More Toshiba Manuals
Login
Sign In
OR
Sign in with Facebook
Sign in with Google
Upload manual
Upload from disk
Upload from URL