Sign In
Upload
Manuals
Brands
Toshiba Manuals
All in One Printer
e-STUDIO203
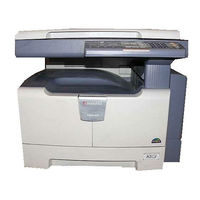
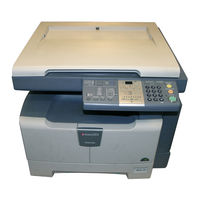
User Manuals: Toshiba e-STUDIO203 Mono Laser MFP
Manuals and User Guides for Toshiba e-STUDIO203 Mono Laser MFP. We have
9
Toshiba e-STUDIO203 Mono Laser MFP manuals available for free PDF download: Service Handbook, Service Manual, Operator's Manual
Toshiba e-STUDIO203 Service Manual (236 pages)
MULTIFUNCTIONAL DIGITAL SYSTEMS
Brand:
Toshiba
| Category:
Mfp
| Size: 7.56 MB
Table of Contents
Table of Contents
7
Specifications / Accessories / Options / Supplies
11
Specifications
11
Accessories
14
Options
15
Supplies
16
System List
17
Outline of the Machine
19
Sectional View
19
Electric Parts Layout
22
Symbols and Functions of Various Components
29
General Description
33
System Block Diagram
33
Construction of Boards
34
Disassembly and Replacement of Covers
36
Disassembly and Replacement of PC Boards
41
Removal and Installation of Options
46
Copy Process
53
General Description of Copying Process
53
Details of Copying Process
54
Comparison with E-STUDIO230/280
65
General Operation
67
Overview of Operation
67
Description of Operation
68
Warming-Up
68
Ready State (Ready for Copying)
68
Drawer Feed Copying
69
Bypass Feed Copying
70
Interruption Copying
70
Detection of Abnormality
71
Types of Abnormality
71
Description of Abnormality
72
Flow Chart
75
Immediately after the Power Is Turned on
75
Automatic Paper Feed Copying
77
Control Panel
79
Control Panel and LED Display
79
Items Displayed on Control Panel
80
Relation between Equipment State and Operation
82
Operation
83
Block Diagram
83
LED Display Circuit
83
Disassembly and Replacement
84
Scanner
87
General Description
87
Construction
88
Functions
89
Description of Operation
91
Scanning Operation
91
Scan Motor Drive Circuit
92
2005 - 2008 TOSHIBA TEC CORPORATION All Rights Reserved E-STUDIO163/203
93
Contact Image Sensor Unit Control Circuit
94
Exposure LED Control Circuit
94
CCD Control Circuit
95
Disassembly and Replacement
98
Image Processing
107
General Description
107
Configuration
108
MAIN Board
109
Features
109
Functions of Image Processing Circuit
110
Laser Optical Unit
113
General Description
113
Structure
114
Laser Diode Control Circuit
117
Polygonal Motor Control Circuit
118
Disassembly and Replacement
119
Drive Unit
121
General Description
121
Configuration
122
Functions
123
Main Motor Control Circuit
124
Disassembly and Replacement
126
Paper Feeding System
131
General Description
131
Configuration
132
Functions
133
Operation
135
Drawer
135
Bypass Tray
137
General Operation
139
Disassembly and Replacement
140
Drum Related Section
159
General Description
159
Configuration
160
Functions
161
High-Voltage Output Control Circuit
163
General Description
163
Description of Operation
164
Drum Temperature Detection Circuit
165
General Description
165
Circuit Configuration
165
Temperature/Humidity Detection Circuit
166
General Description
166
Circuit Configuration
166
Disassembly and Replacement
167
Development System
181
General Description
181
Construction
182
Functions
183
Function of each Unit
183
Functions of the Toner Cartridge PC Board (CTRG)
184
Recovered Toner Supply Mechanism
186
Toner Motor Control Circuit
187
Auto-Toner Circuit
188
General Description
188
Function of Auto-Toner Sensor
189
Disassembly and Replacement
191
Fuser / Exit Unit
203
General Description
203
Configurations
204
Functions
205
Operation
206
Fuser Unit Control Circuit
207
Configuration
207
Temperature Detection Section
208
Disassembly and Replacement
213
Power Supply Unit
223
Construction
223
Operation of DC Output Circuit
224
Output Channel
225
Fuse
226
Configuration of Power Supply Unit
227
Power Supply Sequence
228
AC Wire Harness
229
Advertisement
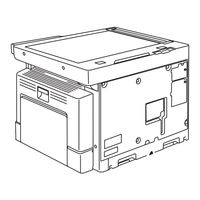
Toshiba e-STUDIO203 Service Manual (222 pages)
MULTIFUNCTIONAL DIGITAL SYSTEMS
Brand:
Toshiba
| Category:
All in One Printer
| Size: 7.26 MB
Table of Contents
Service Manual
1
E-STUDIO163/203
3
Table of Contents
7
1 Specifications / Accessories / Options / Supplies
11
Specifications
11
Accessories
15
Options
16
Supplies
17
System List
18
2 Outline of the Machine
19
Sectional View
19
Electric Parts Layout
22
Symbols and Functions of Various Components
29
General Description
33
System Block Diagram
33
Construction of Boards
34
Disassembly and Replacement of Covers
36
Disassembly and Replacement of PC Boards
41
Removal and Installation of Options
44
3 Copy Process
49
General Description of Copying Process
49
Details of Copying Process
50
Comparison with E-STUDIO230/280
61
4 General Operation
63
Overview of Operation
63
Description of Operation
64
Warming-Up
64
Ready State (Ready for Copying)
64
Drawer Feed Copying
65
Bypass Feed Copying
67
Interruption Copying
67
Detection of Abnormality
68
Types of Abnormality
68
Description of Abnormality
69
Flow Chart
72
Immediately after the Power Is Turned on
72
Automatic Paper Feed Copying
75
5 Control Panel
77
Control Panel and LED Display
77
Items Displayed on Control Panel
78
Relation between Equipment State and Operation
80
Operation
81
Block Diagram
81
LED Display Circuit
81
Disassembly and Replacement
82
6 Scanner
85
General Description
85
Construction
86
Functions
87
Description of Operation
88
Scanning Operation
88
Scan Motor Drive Circuit
88
Contact Image Sensor Unit Control Circuit
89
Exposure LED Control Circuit
89
CCD Control Circuit
90
Disassembly and Replacement
92
7 Image Processing
101
General Description
101
Configuration
102
MAIN Board
103
Features
103
Functions of Image Processing Circuit
103
8 Laser Optical Unit
109
General Description
109
Structure
110
Laser Diode Control Circuit
114
Polygonal Motor Control Circuit
115
Disassembly and Replacement
116
9 Drive Unit
117
General Description
117
Configuration
118
Functions
119
Main Motor Control Circuit
120
Disassembly and Replacement
122
10 Paper Feeding System
127
General Description
127
Configuration
128
Functions
129
Operation
131
Drawer
131
Bypass Tray
132
General Operation
133
Disassembly and Replacement
134
11 Drum Related Section
149
General Description
149
Configuration
150
Functions
151
High-Voltage Output Control Circuit
153
General Description
153
Description of Operation
154
Drum Temperature Detection Circuit
155
General Description
155
Circuit Configuration
155
Temperature/Humidity Detection Circuit
156
General Description
156
Circuit Configuration
156
Disassembly and Replacement
157
12 Development System
169
General Description
169
Construction
170
Functions
171
Function of each Unit
171
Functions of the Toner Cartridge PC Board (CTRG)
172
Recovered Toner Supply Mechanism
173
Toner Motor Control Circuit
174
Auto-Toner Circuit
175
General Description
175
Function of Auto-Toner Sensor
176
Disassembly and Replacement
178
13 Fuser / Exit Unit
189
General Description
189
Configurations
190
Functions
191
Operation
192
Fuser Unit Control Circuit
193
Configuration
193
Temperature Detection Section
194
Disassembly and Replacement
199
14 Power Supply Unit
209
Construction
209
Operation of DC Output Circuit
210
Output Channel
211
Fuse
212
Configuration of Power Supply Unit
213
Power Supply Sequence
214
AC Wire Harness
215
15 Pc Boards
217
Toshiba e-STUDIO203 Service Handbook (237 pages)
MULTIFUNCTIONAL DIGITAL SYSTEMS
Brand:
Toshiba
| Category:
All in One Printer
| Size: 24.22 MB
Table of Contents
Table of Contents
7
Specifications
11
Specifications
13
Specifications / Accessories / Options / Supplies
13
Accessories
14
Options
16
Supplies
17
System List
20
Error Code and Self-Diagnostic Mode
21
Error Code List
21
Service Call
22
Self-Diagnosis Modes
23
Input Check (Test Mode)
25
Output Check (Test Mode)
28
Test Print Mode (Test Mode)
30
List Print Mode (9S)
31
Access Code Mode (8S)
33
Function Setting Mode (1*)
35
Adjustment Mode (05)
37
Setting Mode (08)
53
Test Mode (13)
81
Country/Region Code (02)
83
Adjustment
85
Adjustment of Auto-Toner Sensor
85
Image Dimensional Adjustment
87
Paper Alignment at the Registration Roller
89
Printer Related Adjustment
91
Scanner Related Adjustment
95
Image Quality Adjustment (Copying Function)
103
Gamma Slope Adjustment
104
Sharpness Adjustment
105
Setting Range Correction
106
Setting Range Correction (Adjustment of Text Peak)
107
Adjustment of Image Density
108
Image Quality Adjustment (Printing Function)
109
Adjustment of Image Density
110
Image Quality Adjustment (Scanning Function)
111
Sharpness Adjustment
112
Setting Range Correction
113
Setting Range Correction (Adjustment of Text Peak)
114
Adjustment of High-Voltage Transformer
115
Precautions
121
Adjustment of the Scanner Section
123
Cis Unit
123
Cis Unit Drive Belt
123
Scan Motor (Cis Unit Drive Belt)
124
Adjustment of the Paper Feeding System
125
Sheet Sideways Deviation Caused by Paper Feeding
125
Adjustment of Developer Unit
126
Doctor-To-Sleeve Gap
126
Adjustment of the Adf (Mr)
129
Adjustment of Adf Position
129
Adjustment of ADF Height
134
Adjustment of Skew
136
Adjustment of the Leading Edge Position
138
Adjustment of Horizontal Position
139
Adjustment of Copy Ratio
140
Adjustment of ADF Opening/Closing Sensor
141
Preventive Maintenance (Pm)
143
General Descriptions for Pm Procedure
143
Operational Items in Overhauling
144
Preventive Maintenance Checklist
145
Pm Kit
154
Jig List
155
Grease List
156
Precautions for Storing and Handling Supplies
157
Precautions for Storing Toshiba Supplies
157
Checking and Cleaning of Photoconductive Drum
158
Checking and Cleaning of Drum Cleaning Blade
159
Checking and Cleaning of Fuser Roller and Pressure Roller
159
Troubleshooting
161
Diagnosis and Prescription for each Error Code
161
Paper Transport Jam
161
Paper Misfeeding
164
Cover Open Jam
167
Transport Jam (Adf)
170
Drive System Related Service Call
173
Scanning System Related Service Call
174
Fuser Unit Related Service Call
175
ADF Related Service Call
178
Laser Optical Unit Related Service Call
178
Service Call for Others
179
Optional Communication Related Service Call
180
Troubleshooting for the Image
181
Replacement of PC Boards
203
Replacing Main Board
203
Replacing Sram Board
203
Firmware Updating
209
Firmware Updating with Download Jig
209
Pwa-Dwnld-350-Jig
211
Writing the Data to the Download Jig (Pwa-Dwnld-350-Jig)
214
K-Pwa-Dlm-320
215
Firmware Updating with Toshiba Viewer
217
E-Studio163/203 Only
217
General Description
221
Firmware Updating with Software Update Tool
221
System Requirements
221
Preparation and Precaution
221
Update Procedure
221
Power Supply Unit
227
Output Channel
227
Fuse
228
Configuration of Power Supply Unit
229
AC Wire Harness
231
Electric Parts Layout
235
Advertisement
Toshiba e-STUDIO203 Service Handbook (220 pages)
Brand:
Toshiba
| Category:
All in One Printer
| Size: 14.55 MB
Table of Contents
Table of Contents
7
Specifications / Accessories / Options / Supplies
11
Specifications
13
Accessories
16
Options
17
Supplies
18
System List
19
Error Code and Self-Diagnostic Mode
21
Error Code List
21
Jam
21
Service Call
22
Self-Diagnosis Modes
23
Input Check (Test Mode 03)
25
Output Check (Test Mode 04)
28
Test Print Mode (Test Mode 07)
30
List Print Mode (9S)
31
Access Code Mode (8S)
33
Function Setting Mode (1*)
35
Adjustment Mode (05)
36
Setting Mode (08)
52
Adjustment
79
Adjustment of Auto-Toner Sensor
79
Image Dimensional Adjustment
81
General Description
81
Paper Alignment at the Registration Roller
83
Printer Related Adjustment
85
Scanner Related Adjustment
89
Image Quality Adjustment (Copying Function)
97
Density Adjustment
97
Gamma Slope Adjustment
98
Sharpness Adjustment
99
Setting Range Correction
100
Setting Range Correction (Adjustment of Background Peak)
100
Setting Range Correction (Adjustment of Text Peak)
101
Adjustment of Smudged/Faint Text
101
Adjustment of Image Density
102
Image Quality Adjustment (Printing Function)
103
Adjustment of Smudged/Faint Text
103
Adjustment of Image Density
104
Image Quality Adjustment (Scanning Function)
105
Density Adjustment
105
Sharpness Adjustment
106
Setting Range Correction
107
Setting Range Correction (Adjustment of Background Peak)
107
Setting Range Correction (Adjustment of Text Peak)
108
Adjustment of High-Voltage Transformer
109
Adjustment
109
Precautions
115
Adjustment of the Scanner Section
117
CIS Unit
117
CIS Unit Drive Belt-1
117
Scan Motor (CIS Unit Drive Belt-2)
118
Adjustment of the Paper Feeding System
119
Sheet Sideways Deviation Caused by Paper Feeding
119
Adjustment of Developer Unit
120
Doctor-To-Sleeve Gap
120
Adjustment of the ADF (MR-2017)
123
Adjustment of ADF Position
123
Adjustment of ADF Height
128
Adjustment of Skew
130
Adjustment of the Leading Edge Position
132
Adjustment of Horizontal Position
133
Adjustment of Copy Ratio
134
Adjustment of ADF Opening/Closing Sensor
135
Preventive Maintenance (Pm)
137
General Descriptions for PM Procedure
137
Operational Items in Overhauling
138
Preventive Maintenance Checklist
139
Pm Kit
148
Jig List
149
Grease List
150
Precautions for Storing and Handling Supplies
151
Precautions for Storing TOSHIBA Supplies
151
Checking and Cleaning of Photoconductive Drum
152
Checking and Cleaning of Drum Cleaning Blade
153
Checking and Cleaning of Fuser Roller and Pressure Roller
153
Troubleshooting
155
Diagnosis and Prescription for each Error Code
155
Paper Transport Jam
155
Paper Misfeeding
158
Cover Open Jam
161
Transport Jam (ADF)
164
Drive System Related Service Call
167
Scanning System Related Service Call
168
Fuser Unit Related Service Call
169
ADF Related Service Call
171
Laser Optical Unit Related Service Call
171
Service Call for Others
172
Troubleshooting for the Image
173
Replacement of PC Boards
195
Replacing MAIN Board
195
Replacing SRAM Board
195
Firmware Updating
199
Firmware Updating with Download Jig
199
Pwa-Dwnld-350-Jig
201
Writing the Data to the Download Jig (PWA-DWNLD-350-JIG)
204
K-Pwa-Dlm-320
205
Firmware Updating with TOSHIBA Viewer
206
Power Supply Unit
211
Output Channel
211
Fuse
212
Configuration of Power Supply Unit
213
Wire Harness Connection
215
AC Wire Harness
215
8.2 DC Wire Harness
217
8.3 Electric Parts Layout
218
Toshiba e-STUDIO203 Service Handbook (235 pages)
Brand:
Toshiba
| Category:
All in One Printer
| Size: 8.8 MB
Table of Contents
Table of Contents
7
Specifications / Accessories / Options / Supplies
11
Specifications
13
Accessories
14
Options
16
Supplies
17
System List
20
Error Code and Self-Diagnostic Mode
21
Service Call
22
Self-Diagnosis Modes
23
Input Check (Test Mode 03)
25
Output Check (Test Mode 04)
28
Test Print Mode (Test Mode 07)
30
List Print Mode (9S)
31
Access Code Mode (8S)
33
Function Setting Mode (1*)
35
Adjustment Mode (05)
36
Setting Mode (08)
52
Test Mode (13)
80
Country/Region Code (02)
82
Adjustment
83
Image Dimensional Adjustment
85
Paper Alignment at the Registration Roller
87
Printer Related Adjustment
89
Scanner Related Adjustment
93
Image Quality Adjustment (Copying Function)
101
Gamma Slope Adjustment
102
Sharpness Adjustment
103
Setting Range Correction
104
Setting Range Correction (Adjustment of Text Peak)
105
Adjustment of Image Density
106
Image Quality Adjustment (Printing Function)
107
Adjustment of Image Density
108
Image Quality Adjustment (Scanning Function)
109
Sharpness Adjustment
110
Setting Range Correction
111
Setting Range Correction (Adjustment of Text Peak)
112
Adjustment of High-Voltage Transformer
113
Precautions
119
Adjustment of the Scanner Section
121
Scan Motor (CIS Unit Drive Belt-2)
122
Adjustment of the Paper Feeding System
123
Adjustment of Developer Unit
124
Adjustment of the ADF (MR-2017)
127
Adjustment of ADF Height
132
Adjustment of Skew
134
Adjustment of the Leading Edge Position
136
Adjustment of Horizontal Position
137
Adjustment of Copy Ratio
138
Adjustment of ADF Opening/Closing Sensor
139
Preventive Maintenance (Pm)
141
Operational Items in Overhauling
142
Preventive Maintenance Checklist
143
Jig List
153
Grease List
154
Precautions for Storing and Handling Supplies
155
Checking and Cleaning of Photoconductive Drum
156
Checking and Cleaning of Drum Cleaning Blade
157
Troubleshooting
159
Paper Misfeeding
162
Cover Open Jam
165
Transport Jam (ADF)
168
Drive System Related Service Call
171
Scanning System Related Service Call
172
Fuser Unit Related Service Call
173
ADF Related Service Call
176
Service Call for Others
177
Optional Communication Related Service Call
178
Troubleshooting for the Image
179
Replacement of PC Boards
201
Firmware Updating
207
Pwa-Dwnld-350-Jig
209
Writing the Data to the Download Jig (PWA-DWNLD-350-JIG)
212
K-Pwa-Dlm-320
213
Firmware Updating with TOSHIBA Viewer (E-STUDIO163/203 Only)
215
Firmware Updating with Software Update Tool
219
Power Supply Unit
225
Fuse
226
Configuration of Power Supply Unit
227
AC Wire Harness
229
Electric Parts Layout
233
Toshiba e-STUDIO203 Service Handbook (222 pages)
Brand:
Toshiba
| Category:
All in One Printer
| Size: 8.21 MB
Table of Contents
Table of Contents
7
Specifications
13
1 Specifications / Accessories / Options / Supplies
13
System List
19
Error Code List
21
2 Error Code and Self-Diagnostic Mode
21
Service Call
22
Self-Diagnosis Modes
23
Input Check (Test Mode)
25
Output Check (Test Mode)
28
Test Print Mode (Test Mode)
30
List Print Mode (9S)
31
Access Code Mode (8S)
33
3 Adjustment
81
Adjustment of Auto-Toner Sensor
81
Image Dimensional Adjustment
83
General Description
83
Paper Alignment at the Registration Roller
85
Printer Related Adjustment
87
Scanner Related Adjustment
91
Image Quality Adjustment (Copying Function)
99
Gamma Slope Adjustment
100
Sharpness Adjustment
101
Setting Range Correction
102
Adjustment of Image Density
104
Image Quality Adjustment (Printing Function)
105
Image Quality Adjustment (Scanning Function)
107
Adjustment of High-Voltage Transformer
111
Adjustment of the Scanner Section
119
Cis Unit
119
Cis Unit Drive Belt
119
Scan Motor (Cis Unit Drive Belt)
120
Adjustment of the Paper Feeding System
121
Sheet Sideways Deviation Caused by Paper Feeding
121
Adjustment of Developer Unit
122
Doctor-To-Sleeve Gap
122
Adjustment of the Adf (Mr)
125
Adjustment of Adf Position
125
Adjustment of Adf Height
130
Adjustment of Skew
132
Adjustment of the Leading Edge Position
134
Adjustment of Horizontal Position
135
Adjustment of Copy Ratio
136
Adjustment of Adf Opening/Closing Sensor
137
General Descriptions for Pm Procedure
139
4 Preventive Maintenance (Pm)
139
Operational Items in Overhauling
140
Preventive Maintenance Checklist
141
Pm Kit
150
Jig List
151
Grease List
152
Precautions for Storing and Handling Supplies
153
Precautions for Storing Toshiba Supplies
153
Checking and Cleaning of Photoconductive Drum
154
Checking and Cleaning of Drum Cleaning Blade
155
Checking and Cleaning of Fuser Roller and Pressure Roller
155
5 Troubleshooting
157
Paper Transport Jam
157
Diagnosis and Prescription for each Error Code
157
Paper Misfeeding
160
Cover Open Jam
163
Transport Jam (Adf)
166
Drive System Related Service Call
169
Scanning System Related Service Call
170
Fuser Unit Related Service Call
171
Adf Related Service Call
173
Laser Optical Unit Related Service Call
173
Service Call for Others
174
Troubleshooting for the Image
175
Replacement of Pc Boards
197
Replacing Main Board
197
Replacing Sram Board
197
6 Firmware Updating
201
Firmware Updating with Download Jig
201
Writing the Data to the Download Jig (Pwa-Dwnld-350-Jig)
206
Firmware Updating with Toshiba Viewer
208
7 Power Supply Unit
213
Output Channel
213
Configuration of Power Supply Unit
215
Ac Wire Harness
217
Electric Parts Layout
220
Toshiba e-STUDIO203 Service Handbook (218 pages)
MULTIFUNCTIONAL DIGITAL SYSTEMS
Brand:
Toshiba
| Category:
All in One Printer
| Size: 14.62 MB
Table of Contents
Table of Contents
7
Specifications / Accessories / Options / Supplies
9
Specifications
11
Accessories
13
Options
14
Supplies
15
System List
18
Error Code List
19
Jam
19
Service Call
20
Self-Diagnosis Modes
21
Input Check (Test Mode 03)
23
Output Check (Test Mode 04)
27
Test Print Mode (Test Mode 07)
29
Adjustment Mode (05)
30
Setting Mode (08)
45
Classification List of Adjustment Mode (05) / Setting Mode (08)
84
Adjustment
85
Image Dimensional Adjustment
87
General Description
87
Paper Alignment at the Registration Roller
89
Printer Related Adjustment
91
Scanner Related Adjustment
95
Density Adjustment
102
Gamma Slope Adjustment
103
Sharpness Adjustment
104
Setting Range Correction
105
Adjustment of Smudged/Faint Text
106
Adjustment of Image Density
107
Image Quality Adjustment (Printing Function)
108
Adjustment of Image Density
109
Adjustment of High-Voltage Transformer
110
Precautions
116
Adjustment of the Scanner Section
118
Cis Unit
118
Scan Motor (CIS Unit Drive Belt-2)
119
Adjustment of the Paper Feeding System
120
Adjustment of Developer Unit
122
Adjustment of Adf Position
125
Adjustment of Adf Height
130
Adjustment of Skew
132
Adjustment of the Leading Edge Position
134
Adjustment of Horizontal Position
135
Adjustment of Copy Ratio
136
Adjustment of ADF Opening/Closing Sensor
137
General Descriptions for Pm Procedure
139
Operational Items in Overhauling
140
Preventive Maintenance Checklist
141
Jig List
151
Grease List
152
Precautions for Storing and Handling Supplies
153
Precautions for Storing Toshiba Supplies
153
Checking and Cleaning of Photoconductive Drum
154
Checking and Cleaning of Drum Cleaning Blade
155
Troubleshooting
157
Paper Transport Jam
157
Paper Misfeeding
160
Cover Open Jam
163
Transport Jam (ADF)
166
Drive System Related Service Call
169
Scanning System Related Service Call
170
Fuser Unit Related Service Call
171
Adf Related Service Call
173
Laser Optical Unit Related Service Call
173
Service Call for Others
174
Troubleshooting for the Image
175
Replacement of Pc Boards
197
Firmware Updating
199
Firmware Updating with Download Jig
199
Pwa-Dwnld-350-Jig
200
Writing the Data to the Download Jig (PWA-DWNLD-350-JIG)
203
Firmware Updating with Toshiba Viewer
205
Power Supply Unit
209
Output Channel
209
Fuse
210
Configuration of Power Supply Unit
211
AC Wire Harness
213
Electric Parts Layout
216
Toshiba e-STUDIO203 Operator's Manual (162 pages)
Viewer
Brand:
Toshiba
| Category:
All in One Printer
| Size: 5.98 MB
Table of Contents
Governing Law
2
License Agreement
2
Limited Warranty
3
Notice to Users
5
Lineup of Our Manuals
6
Before Reading this Manual
7
Table of Contents
9
Chapter 1 INTRODUCTION
11
Introduction
12
Chapter 2 INSTALLATION
14
About Installation
14
Before Installing the Softwares
14
Installing the USB Driver
17
From the Plug-And-Play Prompt
17
Windows 2000
23
Installing the Printer Driver to the Local Client
33
Before Installing the Printer Driver
33
From the Add Printer Wizard
34
Complete the Installation
41
Installing the TOSHIBA Viewer
66
Before Installing the TOSHIBA Viewer
66
Installation
66
Device Setup
71
To Utilize TOSHIBA Viewer When Logging on as Different User Who also Has Admin Rights
78
Uninstalling the TOSHIBA Viewer
82
Before Uninstalling the TOSHIBA Viewer
82
Removing the E-STUDIO163/203/165/205 COM Port
86
Before Removing the E-STUDIO163/203/165/205 COM Port
86
Installing the Printer Driver to the Network Client
90
Before Installing the Printer Driver
90
Supplement
113
Cancelling Print Jobs
113
Chapter 3 DESCRIPTION of the FUNCTIONS
116
Description of the Main Welcome Menu
116
Summary of each Menu
116
Browse Folders
118
How to Operate "Browse Folders" and each Function
118
Changing the Device Information
119
Copy
142
How to Operate "Copy" and each Function
142
File Scan
143
How to Operate "File Scan" and each Function
143
Email Scan
146
How to Operate "Email Scan" and each Function
146
Setup
148
How to Operate "Setup" and each Function
148
TOSHIBA Viewer GDI Printer
154
How to Print a Document Using TOSHIBA Viewer GDI Printer
154
Index
159
Operator's Manual for TOSHIBA Viewer
162
Toshiba e-STUDIO203 Operator's Manual (116 pages)
Toshiba Multifunctional Digital System Operator's Manual
Brand:
Toshiba
| Category:
All in One Printer
| Size: 3.98 MB
Table of Contents
Notice to Users
3
Lineup of Our Manuals
5
Before Reading this Manual
6
Table of Contents
9
TOSHIBA Quality Is Second to None
13
High Productivity
14
Features of E-STUDIO163/203
15
General Precautions
16
During Maintenance or Inspection
20
When Handling Supplies
20
Disclaimer Notice
21
Chapter 1 PREPARATION
24
Description of each Component
24
Front / Right Side
24
Left Side / Inner Side
25
Configuration of Options
27
Control Panel
28
Preparation 1 - Turning Power on
31
Turning Power on
31
Saving Energy When Not in Use - Energy Saving Mode
32
Preparation 2 - Placing Copy Paper
33
Acceptable Media Types
33
Recommended Paper
34
Placing Paper in Drawers
35
Preparation 3 - Registering Size of Paper Placed
39
Registering Standard Size (A3, A4, A4-R, A5-R, B4)
39
Registering Other Standard Sizes
40
Chapter 2 HOW to MAKE COPIES
44
Placing Originals
44
Acceptable Originals
44
Placing Originals on the Original Glass
45
Placing Booklet-Type Originals such as Books or Catalogues
46
Using Automatic Document Feeder (Optional)
47
Placing Originals on Automatic Document Feeder (Optional)
48
Making Copies
49
Stopping/Resuming Copying
50
Interrupting Copying and Making Another Copy - Interrupt Copy
51
Using Bypass Tray
52
Preparation - Registering Paper Size Placed on Bypass Tray
53
Bypass Copying on Standard Size Paper
57
Chapter 3 COPYING FUNCTIONS
62
Default Settings
62
Paper Selection
63
Automatic Paper Selection (APS)
63
Manual Paper Selection
64
Zooming In/Out Copy Image
66
Automatic Magnification Selection (AMS)
66
Specifying both the Sizes of the Original and the Copy Paper
68
Specifying Reproduction Ratio Manually
69
Copying in same Page Order as Originals - Sort Copying
71
Selecting Image Mode
72
Adjusting Density Level
73
Chapter 4 SETTINGS and MANAGEMENT of EQUIPMENT
76
Switching Operation Sound On/Off
76
Checking Total Number Copied
77
Chapter 5 TROUBLESHOOTING
80
When Message Lamp Is Lit/Blinking
80
Paper Jams
83
Checking Position of Paper Jams
83
Paper Jams Within Automatic Document Feeder (Optional)
84
Paper Jams on Bypass Tray
86
Paper Jam Behind Transfer Unit
87
Paper Jams Within Fuser Unit
89
Paper Jams Within Paper Feed Unit (Optional)
91
Replacing Toner Cartridge
92
Before Calling Service Technician
97
General Operation
97
Toner-Related Items
98
Original/Copy Paper-Related Items
98
Image Trouble
99
Chapter 6 MAINTENANCE and INSPECTION
101
Daily Inspection
102
Cleaning Charger
103
Close the Front Cover
103
Cleaning Transfer Charger
104
Return the Transfer Charger Cleaner into the Cleaner Pocket, and
105
Then Close the Transfer Unit
105
Close the Side Cover
105
Chapter 7 SPECIFICATIONS and OPTIONS
107
E-STUDIO163/203 Specifications
108
Continuous Copying Speed
109
Specifications of Options
110
Packing List
111
Index
113
Advertisement
Related Products
Toshiba e-STUDIO203S
Toshiba e-STUDIO203SD
Toshiba e-STUDIO203L
Toshiba e-studio202L
Toshiba e-STUDIO200L
Toshiba E-STUDIO207
Toshiba E-STUDIO202S
Toshiba e-STUDIO206L
Toshiba E-Studio 2007
Toshiba e-STUDIO207L
Toshiba Categories
Laptop
Air Conditioner
TV
LCD TV
All in One Printer
More Toshiba Manuals
Login
Sign In
OR
Sign in with Facebook
Sign in with Google
Upload manual
Upload from disk
Upload from URL